

The set of hand and power tools needed to effectively work on FTC robots is not excessively long, but there are tools we’ve found extremely valuable, and others not so much. I’m going to try and capture some of our learning over the last 5 years about which tools a new team might be interested in having on hand, and which might be a deferral, or a skip altogether decision.
The tools we’re glad we’ve purchased over time – and where we’re getting them:
Long Term and Short Term Parts Storage
Probably the single most important tool we use throughout the season, is a good system for storing parts waiting to go into a robot, and organizing parts while working on a robot.
Half the battle of designing a mechanism, or repairing something on the robot is knowing what’s available and where to find it.
- Label Maker – Nearly every storage system (parts trays, toolbox drawers) in our workspace has been labeled with P-touch labels (https://www.amazon.com/Brother-Versatile-PTD400AD-Keyboard-Multiple/dp/B00LV8QI9M). Anything that would travel with us (parts trays, tools, phones, controllers) is labeled with our team number as well.
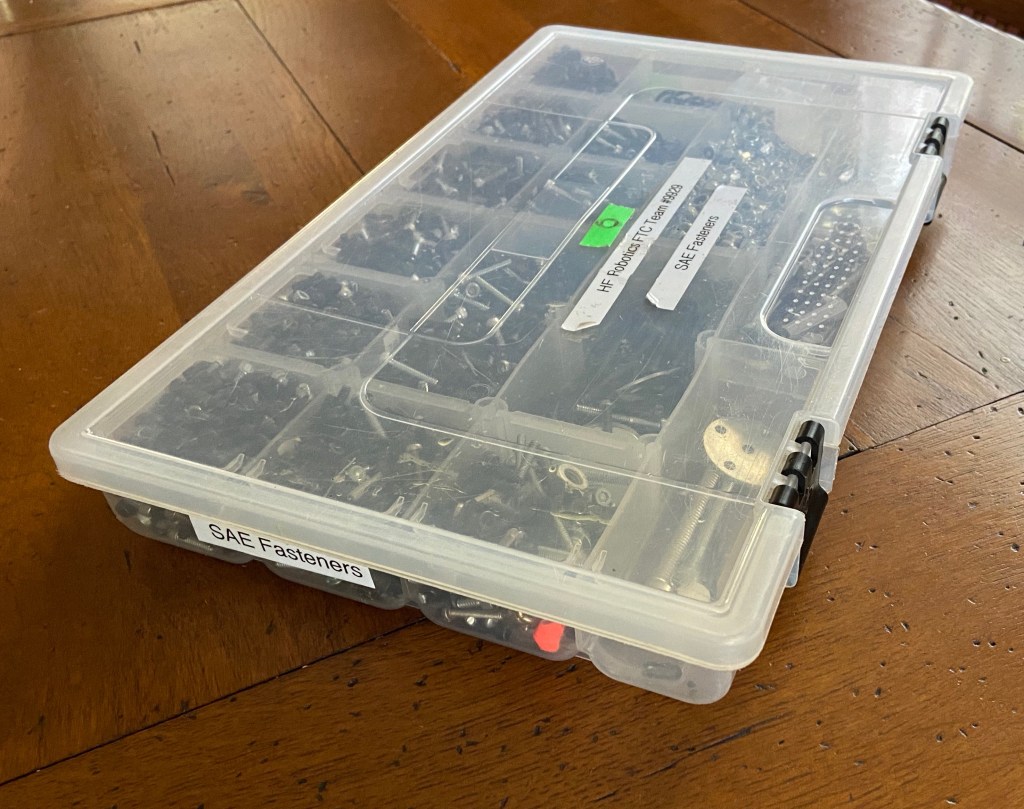
- Parts Storage – We store almost all of our FTC parts in clear organizers made by Plano, which are labeled and color-coded. The storage areas that hold these organizers are likewise color-coded, so there’s no mistaking where our parts should be stored – and therefore it’s easy to know where to go look for them.

- “Akro” Style Bins – For larger structural parts like Actobotics channel and plate, we use bins like these – http://akro-mils.com/Products/Types/Plastic-Storage-Containers/AkroBins. They’re available in various sizes, and there are other manufacturers of similar items. Depending on your storage needs there are purpose-built shelves and wall hanging systems designed for these bins as well.

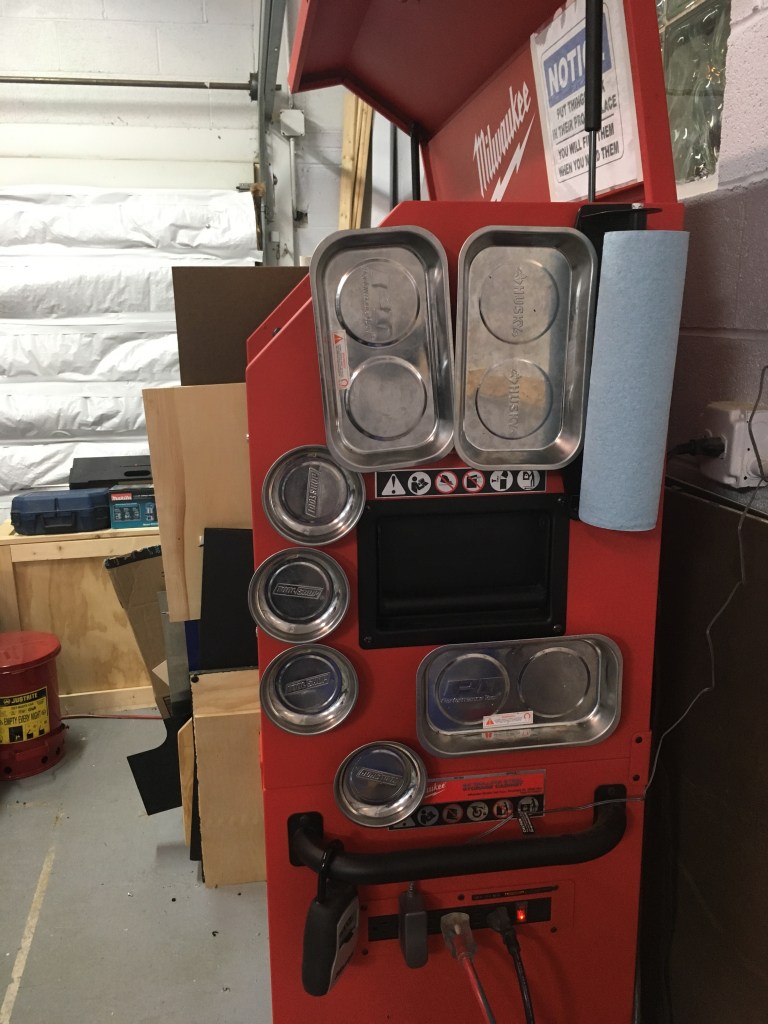
- Magnetic Parts Trays – While working on a robot there are plenty of little screws, washers, bearings, etc. that can roll off workbenches and seemingly be lost forever. For a few seasons now, we’ve placed magnetic parts trays (https://www.homedepot.com/p/Husky-Magnetic-Tray-HMTRAYN/303676220 is one example) at each workstation to help corral these loose parts. It also makes it simpler to clean up our workspace at the end of a team meeting if a job is not complete – the set of parts are all in one place, can usually be left there and not look too disorganized, or can be put behind closed doors when we need to have the workshop look top notch for visitors. Pretty much any home center or auto parts store carries them.
Tool Storage
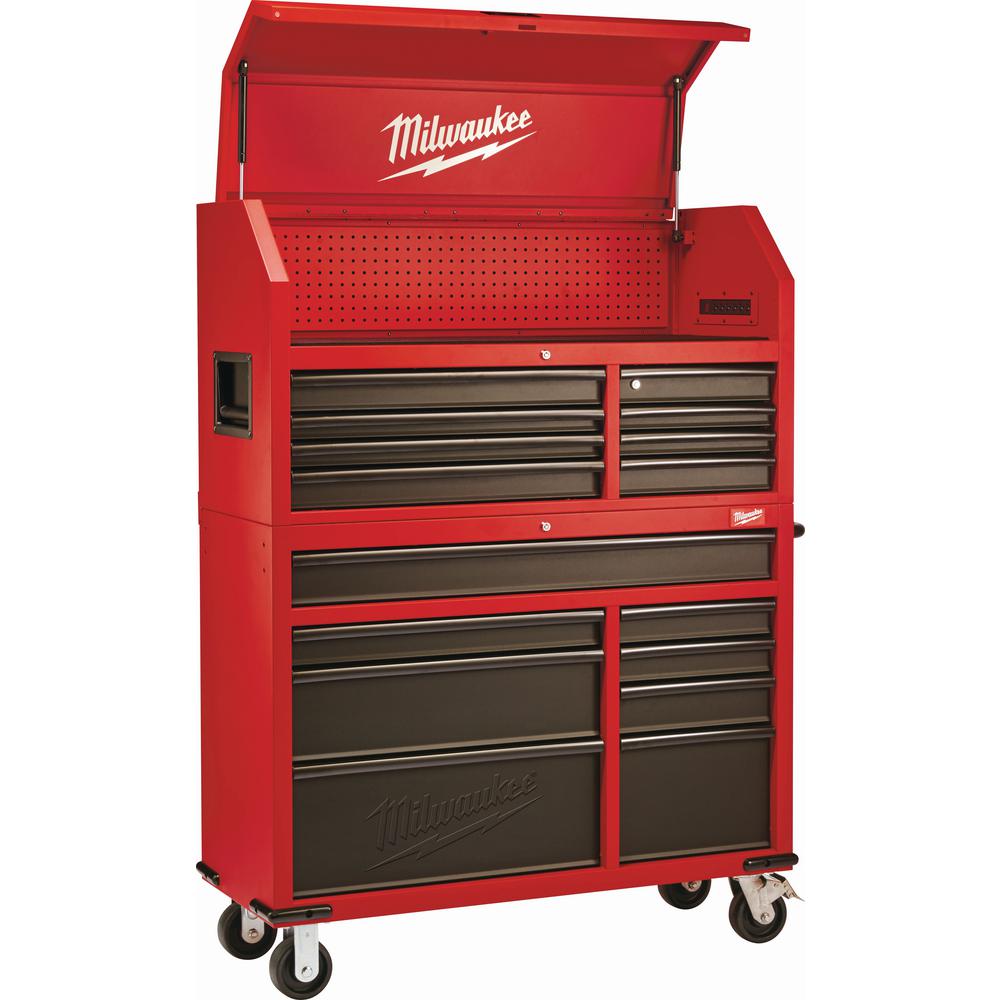
You’ll need a place to store all of these tools. Pretty early on (between our first and second seasons) we made a large investment (on sale for $700 at the time) in a Milwaukee tool chest. It stays in the workshop and doesn’t travel with us. Because it’s large and heavy, and lockable, it does provide security for the rest of our investment in tools. We use a combination lockbox on the outside to hold the keys so that more than two people (the number of keys it comes with) have access to the tools.
When we travel to competitions, our tools and parts are carried in Milwaukee Packout drawers and totes. A huge contributor to that working – is the checklist of tools and critical parts we need for a given season maintained by our pit crew chief.

It seems with some planning, a team might be able to work out of a modular system like this, both in the workshop and at competitions.
Hex Keys and Wrenches
Lots of hex keys, in different forms, but of only really 5 sizes: 7/64, 5/64, 3/32, 3mm, 2.5mm and 2mm. The sizes are used for the following common fasteners in FTC:
- 7/64″ – 6-32 socket head cap screws – the most common size in FTC
- 5/64″ – 6-32 button head socket screws – we use these for tight clearances
- 3/32″ – various set screws on shaft collars – we prefer clamping collars and hubs but we can’t always avoid needing to use a collar or hub that takes a set screw, and they’re often 3/32″ hex drive.
- 3mm – 4mm socket head cap screws – for GoBilda (we’re using more and more GoBilda parts on our robots, especially now that ServoCity seems to be phasing out Actobotics)
- 2.5mm – 3mm socket head cap screws – we use these a lot for servo horn screws, and anything REV
- 2mm – 3mm low-profile screws – REV linear slide system, which we don’t use much anymore, but if you do, you’ll need this size hex key
We have the following in our toolbox:
- Bondhus T-Handle (4″, 6″ and 9″ long, sets of two run around $10/ea on Amazon)
- Single L Keys (handfuls – they’re $0.18 – $0.50 ea from McMaster (https://www.mcmaster.com/hex-keys/l-keys/l-keys-9/), we lump some in when we buy fasteners from there to save on shipping)
- Bondhus Stubby “L” with Ball End (Amazon, but only available in multi-size sets) or full-length keys from McMaster (https://www.mcmaster.com/hex-keys/l-keys/ball-end-l-keys-9/), less than $1 ea.
- Ball End Hex Drivers – we also have ball-end drivers for all of those sizes, available from McMaster (https://www.mcmaster.com/hex-keys/screwdrivers/ball-end-screwdrivers-8/) for a few dollars each.
- 7/64 Hex Insert Bits – these go into the miniature ratcheting wrench mentioned a little later, in a settable torque driver (splurge, more on that later), and we also put them in bit holders in our cordless screw guns for quick (dis)assembly.
We use the T-handles the most, and the regular L keys second most. Ball-end anything will get you out of a jam when you can’t reach a fastener straight on, but you won’t be able to apply much torque. The stubby L keys get you out of that jam. If I had to prioritize to save money, the order listed above is the order I would use.
Another trick we’ve learned is to color code the hex wrenches with heat shrink tubing and/or spray paint. It’s much easier for everyone to find the correct size when someone says “Grab the red wrench” rather than try and find the listed size, especially on the single, loose L keys. Don’t repeat our mistake of putting red color coding on yellow-handled tools, and yellow color codes on red-handled tools!
In the picture at the top of the page, you can see our collection of combination wrenches (one side is open, the other boxed) – while we have many sizes that have been acquired via donations, we find we use the following the most:

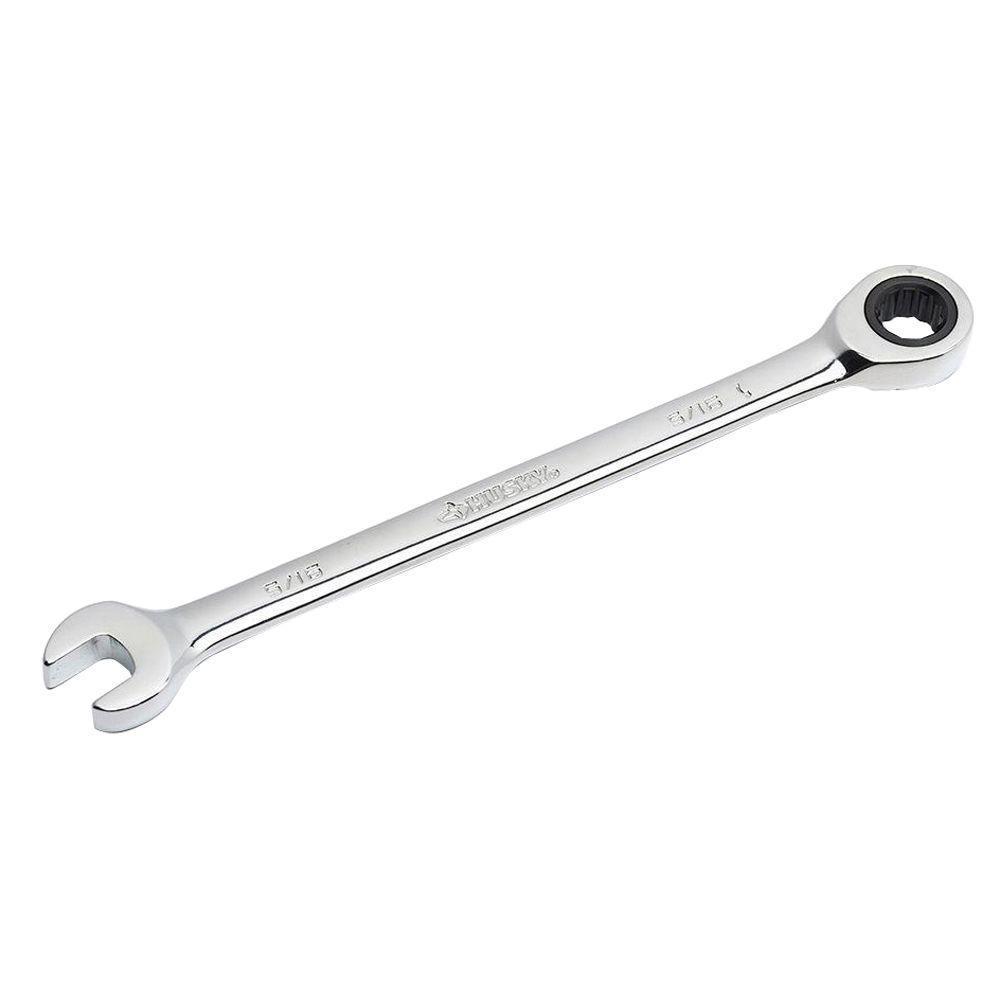
- 5/16″ Combination Wrenches (plain and ratcheting) for the nylock nuts for 6-32 screws.
- 2x or More for Commonly-Used Sizes – at least two each for fasteners you find you use often on your robot. For example – we have sets of 7/16″ wrenches since it’s a common size on our new drive bases, because we use 1/4″ bolts and nuts as part of the axle system.
We use the heck out of the regular combination wrenches – we wish we had purchased the ratcheting ones sooner. Home center store brands like Husky and Masterforce (read “cheap”, $4 for a standard combination wrench, $7-$8 for ratcheting) seem to work just fine.
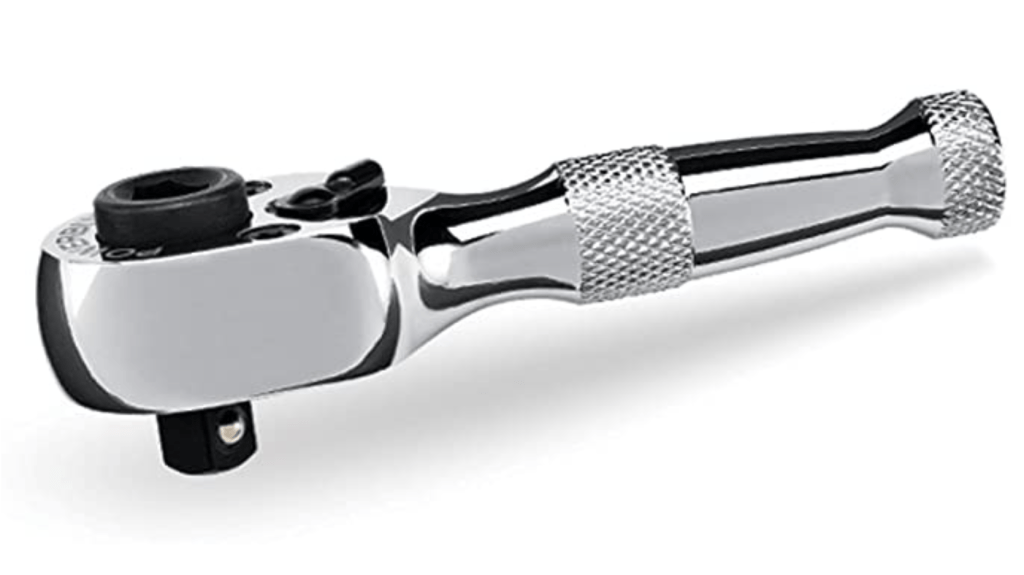
It’s always handy to have sockets and ratchet handles. The standard 3/8″ drive ends up being a bit large for work on FTC robots. We’re using 1/4″ drive tools, namely:
- Multiple 5/16″ Size 1/4″ Drive Sockets – similar to our collection of combination wrenches of the same size, we use (and sometimes lose) lots of these. You can buy single 5/16″ sockets at your home center for $2-$3 each – they don’t need to be expensive brands.
- 1/4″ Drive Spinner Handles – these look like screw drivers, but have a 1/4″ drive socket end. They turn sockets into nut drivers. You could also substitute 5/16″ nut drivers (we have a few), but it seems the spinner/socket combination gets used much more often in our work shop. Store-brand ones should be around $8.
- Assorted Size 1/4″ Drive Sockets – standard depth. Imperial and Metric sizes. A combined set, with a ratchet handle should cost around $30.
- 1/4″ Drive Ratchet Handles – we use these, which also take 1/4″ driver bits (super useful) – https://www.amazon.com/dp/B004QO9DAE/ref=cm_sw_em_r_mt_dp_U_YKeXEb8FZ0W6X
If you work with any 3mm fasteners (REV Robotics parts), you’ll also need 5.5mm sockets or nut drivers, preferably both. You may have luck finding that size socket locally, but the nut driver is an on-line item:
- 5.5mm Nut Driver – We have this 5.5mm Wiha nut driver from Amazon ($10) – https://www.amazon.com/gp/product/B000T9UGGA/
- 5.5mm 1/4″ Drive Sockets – As well as some of these 5.5mm sockets ($6) https://www.amazon.com/gp/product/B007QV33F0/
It doesn’t hurt to have an adjustable Crescent-style wrench on hand for that oddball fastener – but your team will be stripping a lot fewer fasteners if they have the right size combination wrenches and sockets available. We tend to need it for game piece assembly, nothing on our robots.
Since we’re talking about tools that put screws into things, we can’t forget to talk about preventing screws from coming out of things until you want them to. We’ll have another post about fasteners in general, but do your team a favor and have Loctite on hand. Used sparingly, it will prevent screws that can’t have a locking nut on them from backing out before you remove them on purpose. Note – do not use red Loctite, it’s permanent. The correct color of removable Loctite for the size of fasteners on FTC robots is purple, but it’s hard to find. Blue, which is available at your local home center or hardware store works fine too.
Pliers, Plier-like Things and Diagonal Cutters
We have a drawer full of pliers, cutters and another drawer of clamps.
- Assorted Miniature Pliers – Diagonal cutters, needlenose, bent needlenose, long needlenose pliers – we usually get sets of them – again, home center store brands (Husky, Masterforce, etc.) seem to work fine. A good length is 4″ or so. If not available in sets, these should cost $4-$5 each.
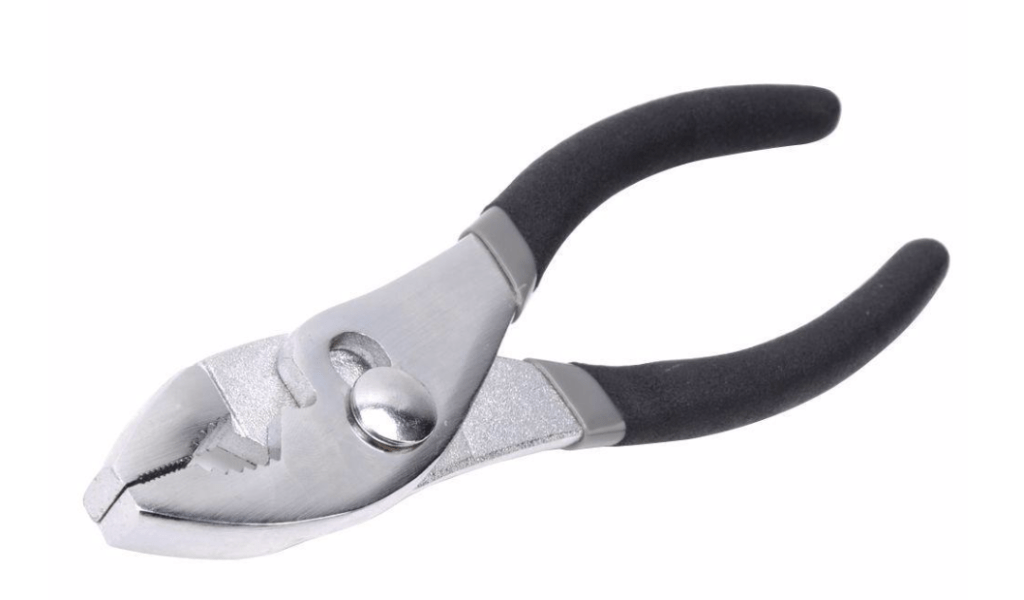
- Standard Slip-Joint Pliers – almost always useful, and you can usually find a spare sitting in someone’s toolbox they’ll be willing to donate to you.
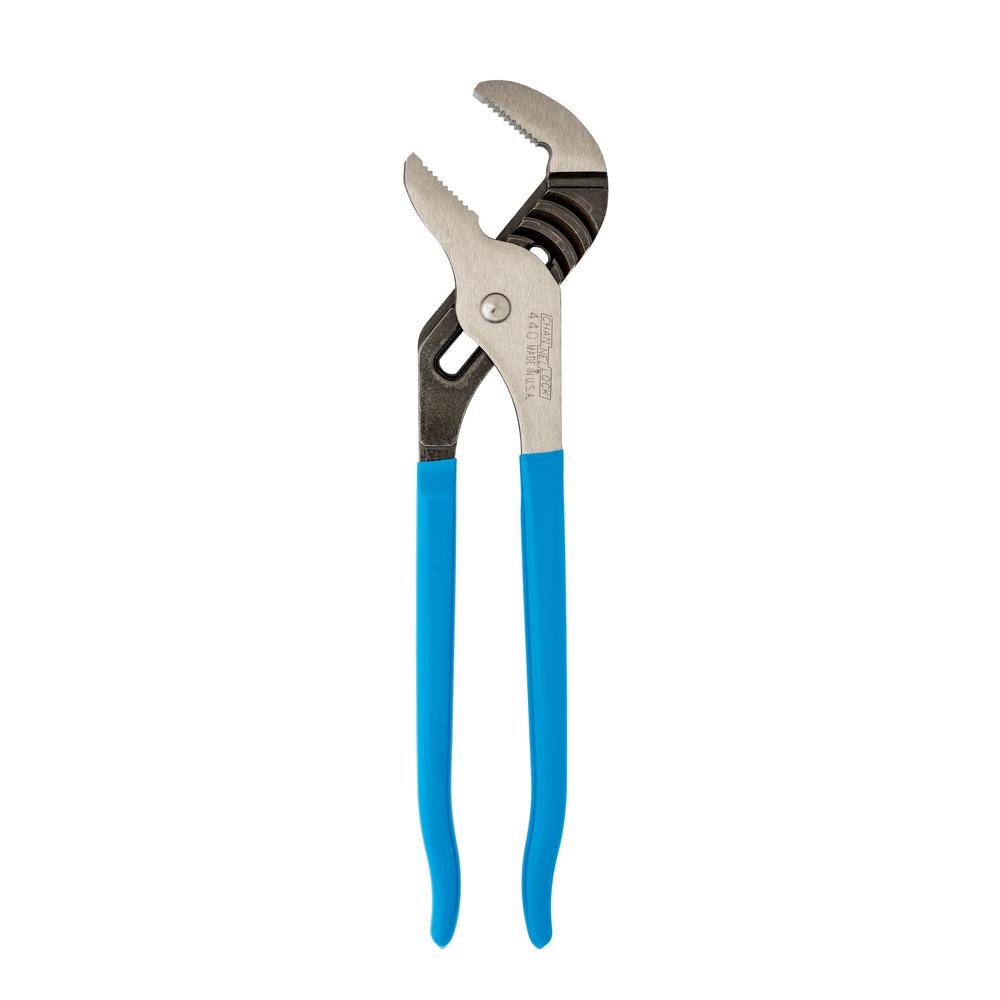
- Channel-lock Type Pliers, store brand is fine, an 8″ pair will be $8-$10.
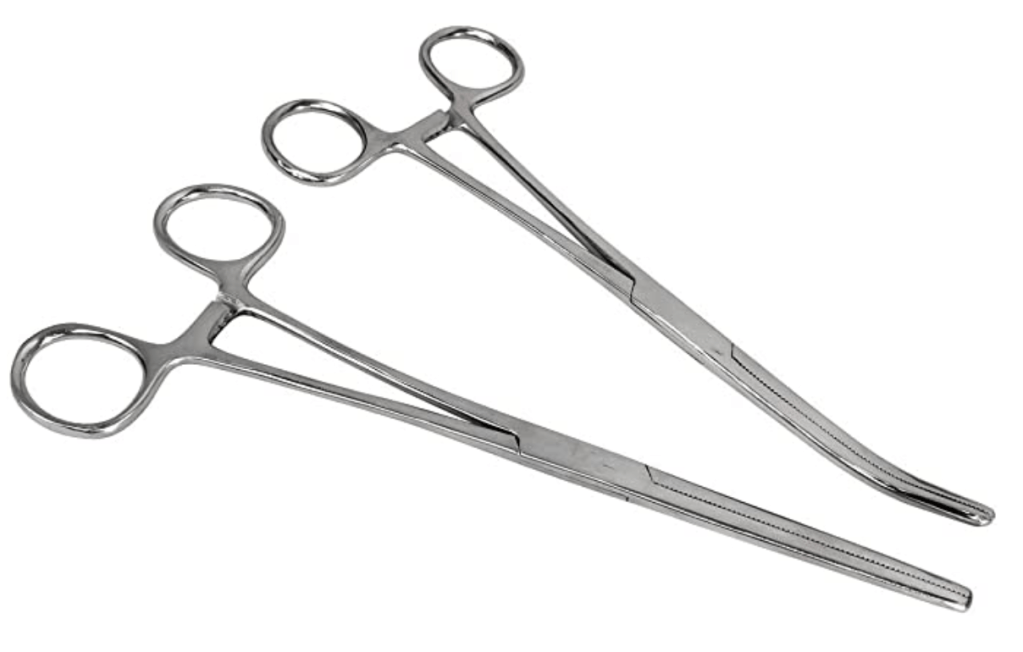
- Hemostats – long handled – they’re like pliers but they lock/clamp, and can reach into tiny spots – https://www.amazon.com/gp/product/B000W1Y9YU.
- Spring Clamps, Small C-clamps, Mini Bar Clamps – the cheap ones from Home Depot/Menards/Harbor Freight are fine. The bar clamps are especially good for holding lifts up while working on them.
- Flush cutters – While you can use diagonal cutters to trim zip ties – they end up leaving razor sharp ends which we all inevitably get cut on. Xuron is a good brand, we get them from Amazon (https://www.amazon.com/gp/product/B000IBSFAI), you may find them locally at your big box home center too – they’re around $8. Flush cutters do just what they say, you put the flat side against what you want to leave flush, and the cut side that is left over has the “sharp” bit, which you throw away.
- Screw Pliers – Even though they’re last on the list in this category, there are many on the team that would rank the “Engineer Screw Pliers” as one of our all-time most useful tools. They’re not cheap ($26 from Amazon – https://www.amazon.com/gp/product/B002L6HJAA/), but they’ve gotten us out of plenty of problems, not just stripped screws. They’re the kind of tool that once you’ve used someone else’s copy, you buy a pair for yourself, and give some out as holiday gifts to your best friends.

Screwdrivers
It’s funny, but at this point in the team’s design strategy, and palette of components, we rarely use standard screwdrivers. Pretty much everything is hex. However they are still useful.
- Miniature Screwdrivers – Philips 0 and 00 sizes. Slotted 3mm and below. We splurged ($3-$8 each) and bought Wera brand screwdrivers on Amazon. KC Tools (https://www.kctoolco.com/precision-screwdrivers/?brand[]=43) is another good source. While more expensive up front, they tend to strip less screws, and break fewer tips, so cheaper in time and money in the long run.
- Regular sized Phillips and Slotted Screwdrivers – not usually useful on the robot, but we’ve needed them for field assembly, or fixing other tools in our workshop. I don’t think the team has purchased a single one, they’re all spares donated by mentors and team members.
Cutting Tools
There will always be some part that needs shortened, luckily most of the parts on FTC robots are aluminum which is relatively easy to cut, even by hand. While we use power tools for most of our cutting these days, these hand tools still are still useful, and will serve a new team for a few seasons before they would need to move on to power tools:
- Dark Soul Chain Tool (https://www.andymark.com/products/25-chain-break) – we use this to cut and re-assemble #25 chain using no master links. It’s so important to our team, that we own two, and they travel separately to meets and tournaments. There are now clones from REV, ServoCity, and GoBilda – they may work fine, we haven’t used them. Everyone who’s had to build or service roller chain on our team would tell you it’s worth the $34.
- Hacksaw – the frame is not that important as long as it is in workable shape and holds blades well. More important is having lots of new blades on hand. Dull blades make poor cuts and frustrated saw users.
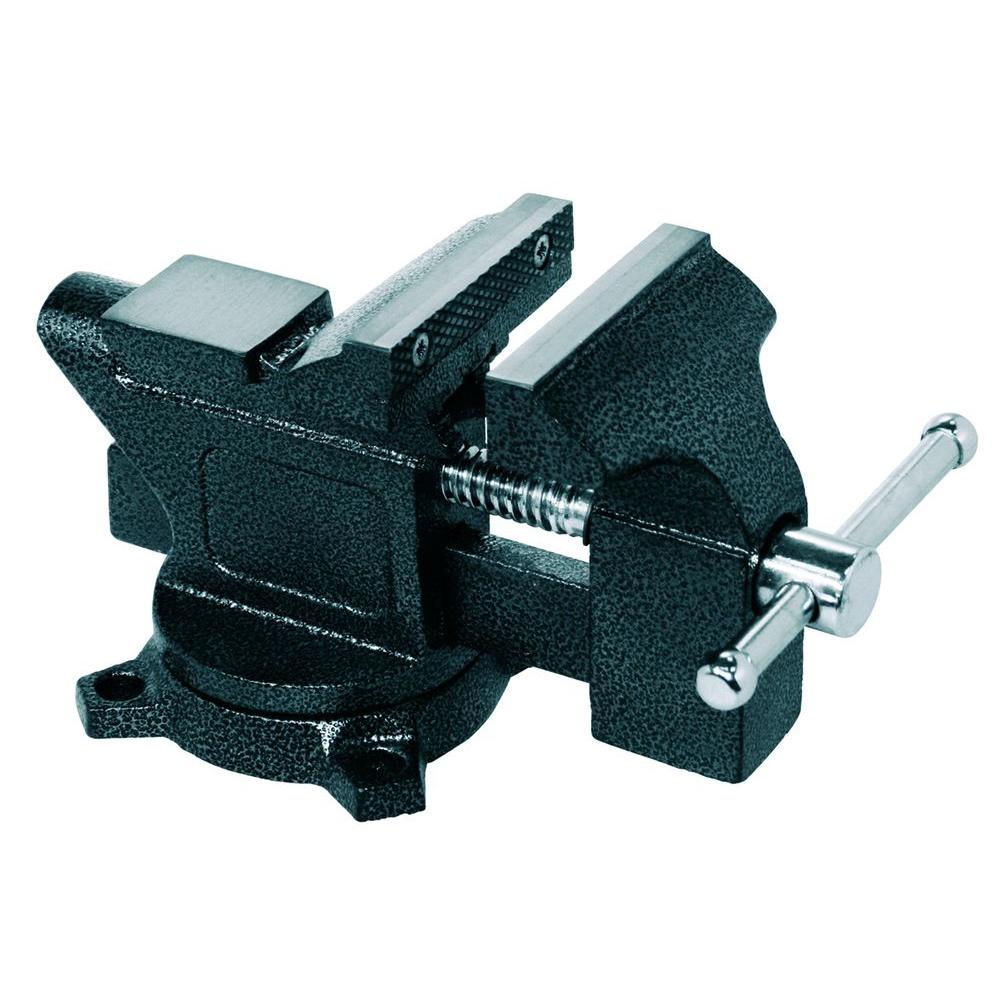
- A good vise – yes, it’s strange that this is in the cutting tools section, but unless you have good work holding tools, your cuts are going to be bad, and the process dangerous. You can purchase serviceable vises at a home center or Harbor Freight, which is where our first bench-mounted vise came from. However, some shrewd estate sale visits can land you a solid vise with some heft to it for next to nothing, compared to purchasing the same quality vise new (many $100). The first vise we purchased for approximately $40, is this one:
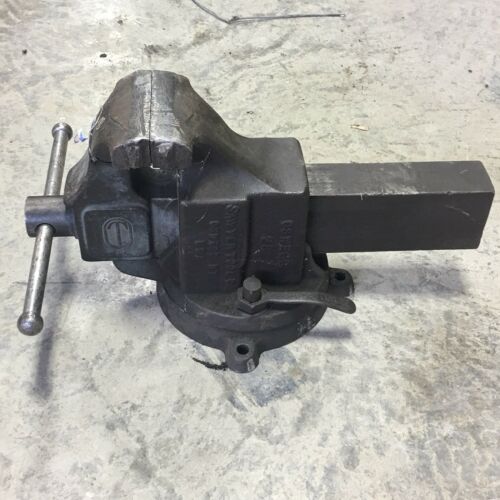
While it’s serviceable, and still in use for tasks like tapping threads, we had a generous friend of the team donate a vintage model similar to this one, which holds parts much more securely, especially while cutting or bending:
- Files – Full-size flat, round (“rat tail”), and miniature (also known as “needle”). Useful for making the parts your team members just cut safe by removing sharp edges and corners. Pretty much all of these we have are donations, people tend to have extras.
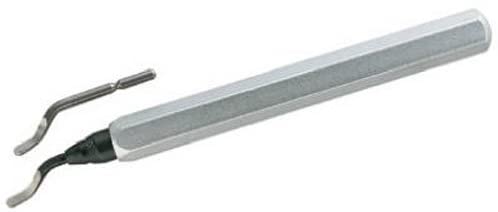
- Deburring tool – Useful for removing sharp edges on long cuts. Especially useful for cleaning up parts coming off of a CNC machine. You pull the cutter along the sharp edge of the piece to be deburred, and it leaves a nice, clean, safe bevel. $12 at Amazon (https://www.amazon.com/gp/product/B00004T828)
- 6-32 and M3 Taps – used for cutting new threads in holes, or cleaning up stripped threads. We use these quite a bit. Because of their size, and delicateness, we just about consider them consumables. It doesn’t matter whether it’s a mentor or a student attempting to use one, they break often. Cheaper ones break much more often, which then leaves you with 2 problems, a broken tap, and how to remove it from the hole. So, it’s worth to spend a little more on the taps themselves. Decent ones seem to be around $5 each, alone or in sets of 3. We use Morse (6-32 at https://www.amazon.com/gp/product/B00PZZDV2O, M3 at https://www.amazon.com/gp/product/B00Q30C6QM), McMaster has them too.
- Tap Handle – you can’t really use a tap without a tap handle. It’s worth the extra money to get a good tap handle. Half the battle of not breaking them, is having a good grip on the tap itself and a good feel for what’s going on. Precision-made tap handles make this possible. We have a Starrett (https://www.amazon.com/gp/product/B0006J4DNK). It set the team back $36, however once you use one vs. the a cheaper model you’ll understand why I say spend the money, or see if your school’s machine shop has one they’ll loan you (forever).
- Tap Magic – The other half of the battle to prevent breaking taps is lubrication. Get yourself a bottle of “Tap Magic” – either via Amazon (https://www.amazon.com/gp/product/B003X3ZKXI), or our local electric wholesaler carries it, as does McMaster. an $8 bottle will be a multi-season investment that will save you a lot of headaches.
Striking Tools
You will only really need two striking tools (hammers) for building robots. Namely:
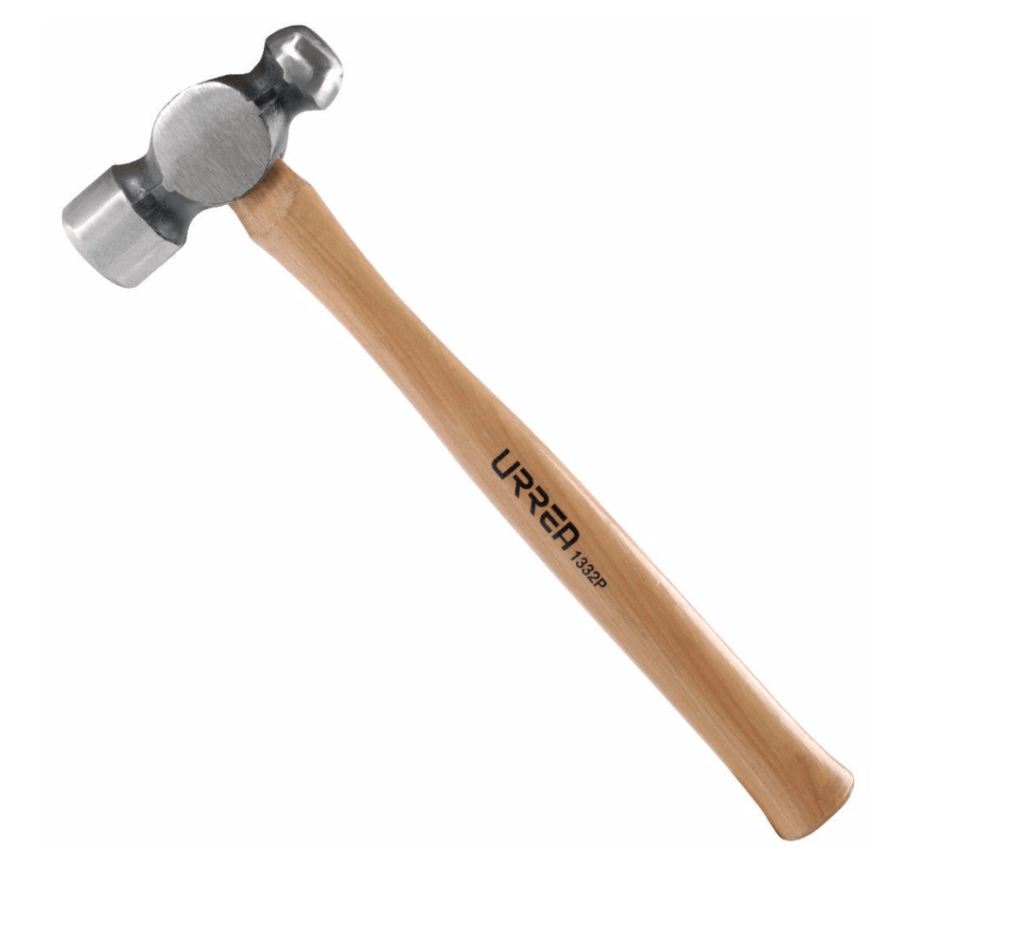
- Ball Peen Hammer – do not use a regular carpenter’s hammer for striking metal parts or tools, they are not designed for this and can cause injury when their brittle face launches shards of metal. You can find ball peen hammers at your local home center or hardware store for $10 – $20.
- Deadblow Hammer – used to “persuade” parts to get into position without deforming or marking them. The $9 one at Harbor Freight is perfectly serviceable, but we also find the expensive ones from vendors like Wiha ($50) much more sized for work on 18″ robots.
Measuring / Layout
This is ending up pretty far down on the list, surprisingly, because our team uses their measuring and layout tools quite a bit – but not as often as everything that is listed earlier. A new team can get by with the following tools:
- Machinists Scales – small, precise, metal rulers. We have one 18″, and a few 6″. Decent ones can be purchased at your local home center for $8-$10 for the 18″ size (handy, because it’s a size constraint for FTC robots – https://www.homedepot.com/p/Empire-18-in-Stiff-Ruler-27318/202035334), and $2-$3 for the 6″ size (https://www.homedepot.com/p/Empire-6-in-Pocket-Ruler-2730/202035324). If you can afford to, having a quality machinist scale, like this Mitutoyo ($13) is a sound investment. They have more precision, and won’t get dinged or bent (https://www.amazon.com/gp/product/B00027958O).
- Tape Measure – At least 16.97 feet long (diagonal distance across the field). If it’s marked in both metric and inches/feet, even better. Not so useful for working on the robot, indispensable for laying out the game field and planning autonomous paths. The Stanley 8m Powerlock fits the bill nicely, and is $13 at Home Depot (https://www.homedepot.com/p/Stanley-PowerLock-8m-26-ft-x-1-in-Tape-Measure-Metric-English-Scale-33-428/100152858)
- Machinist Squares and/or Combination Square – we use both, we started with a combination square, and now have machinist squares as well. A decent combination square will cost $10-$12 (https://www.homedepot.com/p/Empire-12-in-Combination-Square-E250/100356502), you can go crazy and spend a lot of money on quality machinist squares, but cheap ones are fine, as long as they are square. We picked up a set of 3 machinist squares at Menards for $10.
The measuring tools on the list above can carry you a long way. We’ve also found the following tools to be useful as well, but they are either for more advanced use, like machining custom parts, or make tasks possible with the above tools, simpler.
- Digital Calipers – Used to measure diameters of parts, or make measurements for machining operations (cutting and drilling) that need precision better than 1/16″ (about the limit of most students reading a scale). They don’t have to be extremely accurate (read expensive). We have this one from Amazon for $20 – https://www.amazon.com/gp/product/B000GSLKIW/. Make sure to order a few extra batteries – the design of these tools is they are essentially always on, but the display is dark. You don’t want to have to wait for new batteries to be delivered when you really need to use the tool.

- 24″ x 16″ Framing Square – not used for anything on the robot, but used quite often when planning autonomous paths, robot placement, or making sure field elements that are supposed to be perpendicular to something, really are. You can find these at your home center for $8 – $10 (https://www.homedepot.com/p/Empire-16-in-x-24-in-Steel-Framing-Square-1110/100204103).
- 48″ x 22″ Drywall Square – also (of course) not used for anything on the robot, but is sometimes helpful when planning paths for autonomous that travel long, straight distances. Available from your local home center for around $12 (https://www.homedepot.com/p/Empire-48-in-Drywall-T-Square-410-48/202035306).
- Marking Scribes – these look like a pen, but have a hardened steel tip. Use them to make measurement and layout marks on metal. (they leave much finer lines than a marker or pencil). Some do double duty and have a magnetic pickup on the end. They cost around $5-$10, you can get them at your home improvement center (https://www.homedepot.com/p/Empire-5-3-4-in-Long-Scriber-with-Magnet-27021/203121063), or Amazon.
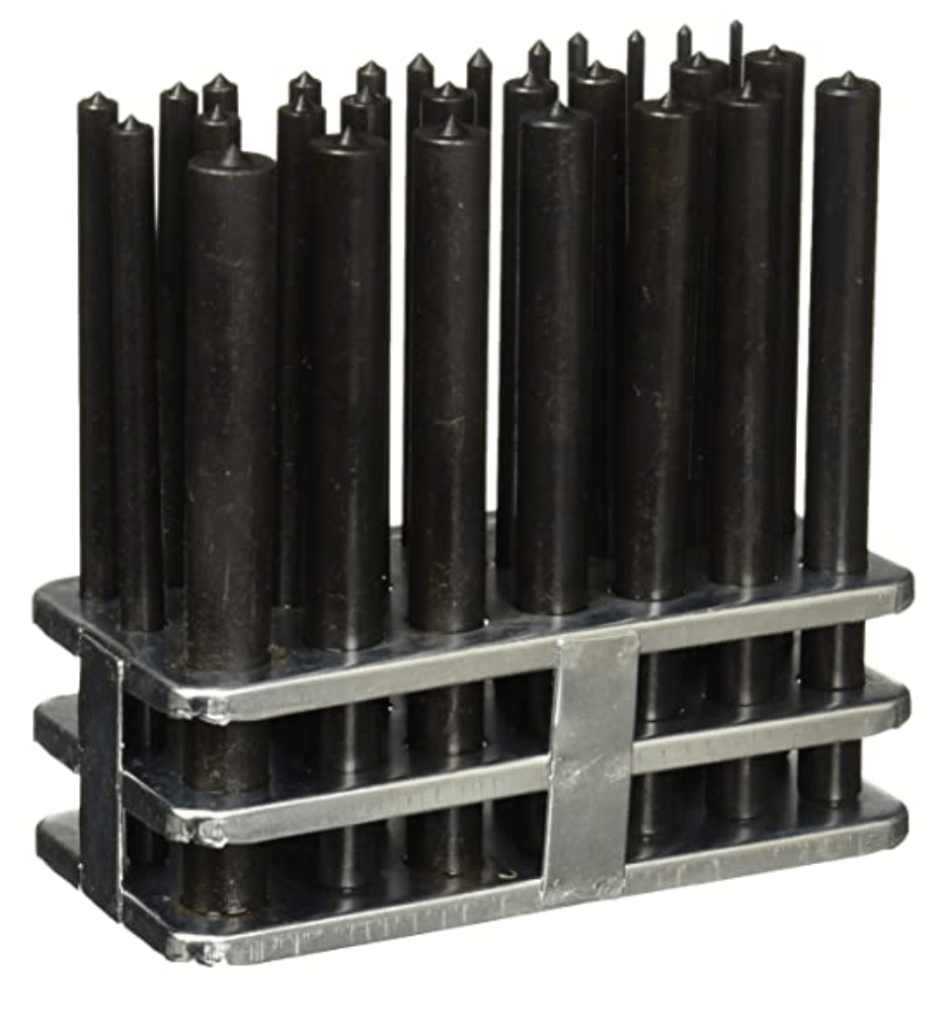
- Center and Prick Punches – used to “tell the drill bit where to go”. Drill bits tend to wander when cutting holes in metal, even when using a drill press. Locating where the hole should be with your scales, squares and scribes, and then finding that location with the prick punch, hitting it with a hammer, and then using the center punch to make a larger dimple at the same location will lead to better placement of holes in the structure of your robot. We made an “investment” in our punches and purchased Starrett punches (https://www.amazon.com/gp/product/B0006J4QOG and https://www.amazon.com/gp/product/B0006J4OUW $8-$10) each so not really much of a splurge.
- Transfer Punches – these are used to transfer the location of the center of an existing hole to another surface without measuring. The punches are the diameter of the existing hole, with a center punch machined exactly in the center. You place the parts together in the desired orientation, put the transfer punch in the existing hole, and strike it with a ball peen hammer leaving a dimple in the to-be-drilled surface that is centered in the existing hole. It is quite a bit easier and faster to accurately locate a screw hole to be drilled to fasten two pieces together than it is to lay it out by measuring using this tool. We purchased ours from Amazon for around $20 – https://www.amazon.com/gp/product/B01ADBNEJE.
Power Tools
The class of power tools that get the most use in our workshop are drills – drill presses, cordless drills and cordless screwdrivers. The most important thing to remember with drilling operations is safety. All power drilling operations have the potential to create dangerous situations if the work is not held securely and safely, or if the tool is otherwise operated incorrectly. Team members and mentors should be trained in how to correctly setup and use powered drills, and you should make sure you have the correct work holding tools to ensure safe operation.
- Drill Press – This is the most accurate way to make holes in your robot. We have two drill presses. One is an inexpensive one we picked up at a local home center for $150. It was passable for our first two seasons. We eventually had a 1950’s drill press donated to the team by a team member’s great grandfather who was a tool and die maker. The older drill press has nearly no run-out (wobble) on the chuck, drills much better holes, and has much more mass which makes for less vibration. The newer drill press is currently gathering dust. If you want to have the best results with drilling operations, you will want a good drill press, either spend more ($500), or do some garage sale shopping to find a 1950-1970 drill press that is in good shape.
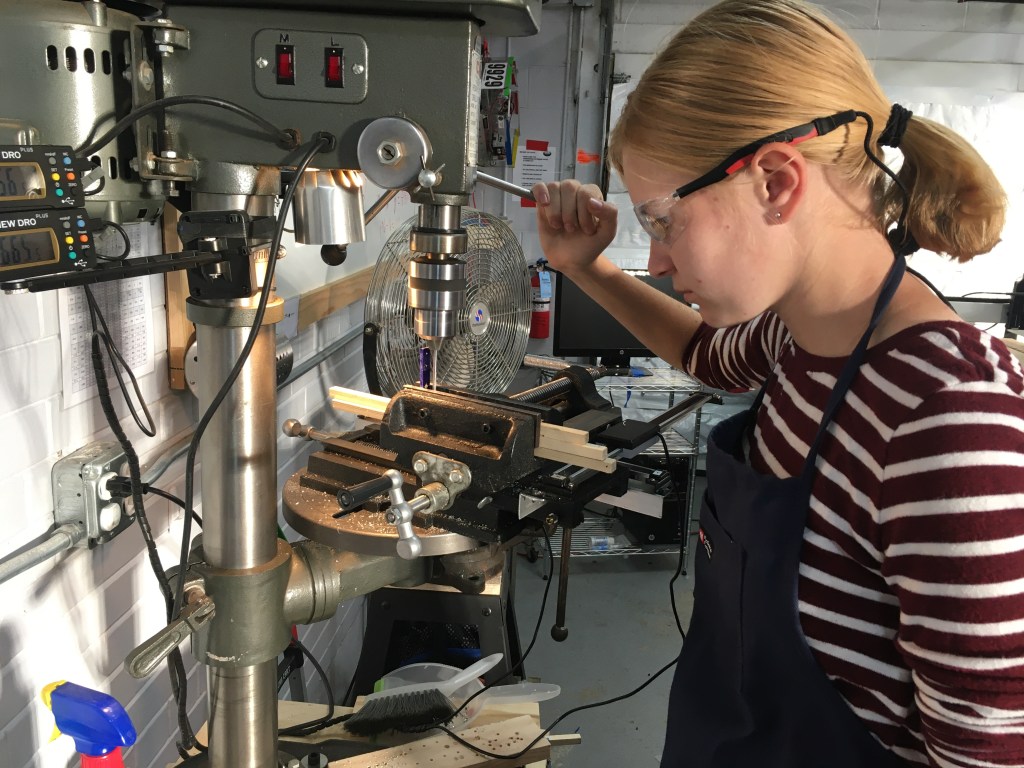
- Drill Press Vise or Cross Slide Vise – At the very least, you’ll want a drill press vise mounted to your drill press. If you can find one at an estate sale, or can purchase one, a “cross slide” vise is much more useful. It allows you to clamp a part for drilling, but then move it pretty accurately in the x and y directions to locate the hole. A cross slide vise also allows you to drill a series of holes spaced along an axis pretty easily. We again have a “vintage” one on our drill press that we’ve also outfitted with “Digital Read Outs (DROs)” that read the position of the part down to the thousandth of an inch (a topic for another blog entry!). I own this particular cross-slide vise, myself – at $50 it is decent value for money – https://www.amazon.com/gp/product/B077QQS9F6

- Drill Bits – When using our drill press, we tend to use what are known as “screw machine” length drill bits. Since we’re only ever drilling holes for 6-32 and 3mm screws, we buy handfuls of single drill bits of that size. The reason we use this length is two-fold. One, a cross slide vise eats up height on the drill press, so there’s not always room for full-length bits. Two, the longer a drill bit is, the more runout (wobble) it has, so it’s less accurate when drilling. We get “wire size” drill bits for the drill press, for 6-32 and 3mm close and free fit (#27 and #25 for 6-32, and 1/8th” and #30 for 3mm (yes, those are imperial sizes for metric fasteners!) – McMaster tends to be the best source for them https://www.mcmaster.com/drills/drill-bits/short-length-drill-bits/system-of-measurement~wire-gauge/ (not expensive either). The printable chart at https://littlemachineshop.com/reference/tapdrill.php is a good thing to print out and hang up somewhere in your workspace. We also have a set of assorted inch size in short length from Chicago Latrobe (https://www.amazon.com/gp/product/B000LDD6EI/). They were expensive, but they’re holding up well, and should be (re)sharpen-able as well.
- Cordless Drills and Drivers – We use Milwaukee M12 cordless drills (https://www.milwaukeetool.com/Products/Power-Tools/Drilling/Drill-Drivers/2407-20) and drivers (https://www.milwaukeetool.com/Products/Power-Tools/Drilling/Drill-Drivers/2406-20). They are expensive ($100 – $130 for tool, battery and charger), but are pretty bulletproof. Besides their robustness, we like their size. They’re scaled much better for younger hands, and for the tight spaces we find on FTC robots.
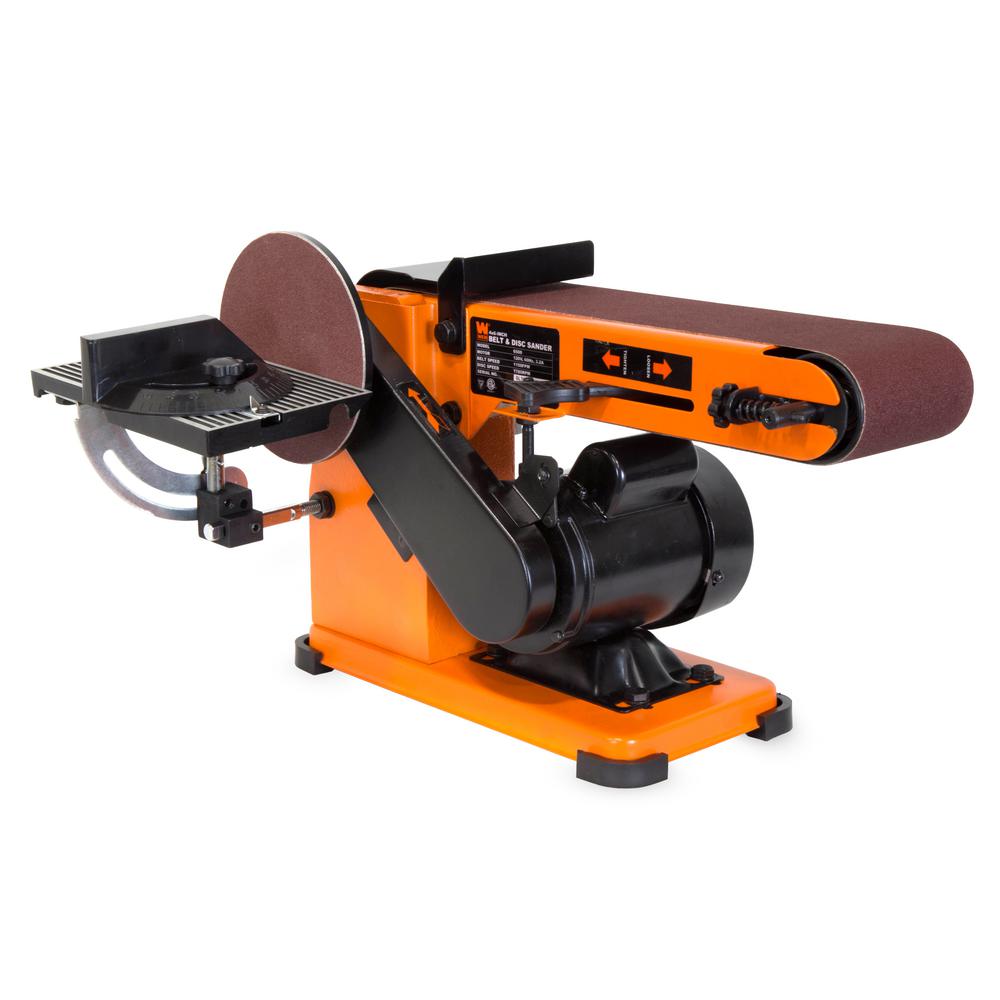
Other brands with the smaller, 12V “platform” are Ridgid and Makita. To be most useful, you’re going to end up investing in a “system”, so that you always have batteries ready when you need them. If you mix and match brands, you will often end up having tools waiting for batteries to be charged. - Stationary Belt/Disc Sander – This tool sees a lot of use. It can remove a lot of aluminum or polycarbonate, quickly. We have to very closely supervise the students (and ourselves) when using the disc side – it’s easy to forget that it’s very important to understand which direction the disc spins, and thus where it’s safe to engage a part (on the side spinning down into the tool rest) and where it’s not (on the side spinning away from the tool rest). Safety training on this tool is a must – as are safety glasses. Ours was donated to the team – but you can find a workable one for around $100 on-line (https://www.amazon.com/WEN-6502T-4-3-Amp-Belt-Sander/dp/B07KL4QGSQ)
- Bandsaw – We have a wood/all-purpose bandsaw fitted with a metal-cutting blade. We have a love/hate relationship with it. We haven’t found a better tool for cutting down aluminum stock and polycarbonate that the students can manage safely – but it’s hard to run it accurately, and cutting metal eats through blades – especially when it gets a little abuse when we forget to lubricate the blade or part being cut, or the operator gets a little antsy and forgets to “let the saw do the work”.
- 3D Printing / CNC Router – These two power tools have become indispensable in how we design and build our FTC robots. However they are essentially workshops in and of themselves and deserve their own discussion about why we have the models we have, and how we selected them. We did purchase a 3D printer one season before we purchased our CNC Router, and made good of use of it since day one. The learning curve for 3D printing is also less steep than CNC, if you were deciding which tool to get first, we’d recommend a 3D printer.
